How carpentry joints are classified
Woodworking joints encompass a diverse array of configurations designed to connect two pieces of wood. Certain joints entail carving channels into separate wood pieces, creating an interlocking mechanism, while others rely on fasteners such as nails or screws for stability.
Given the fundamental role of wood joints in woodworking, a multitude of joint types has been in practice for centuries, and even millennia. The joinery techniques refined by carpenters and craftsmen in ancient China and Egypt continue to influence contemporary contractors and woodworkers, showcasing the enduring relevance and effectiveness of these age-old methods.
12 Common joinery techniques
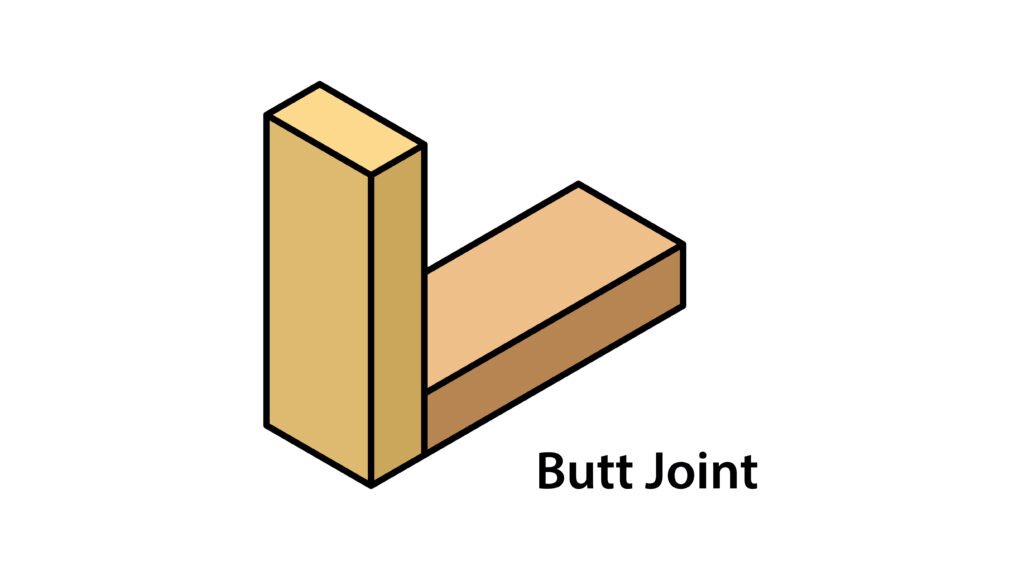
1. Butt joint
The butt joint stands as the most fundamental type of wood joint, where two distinct wood pieces simply align side by side, their butts adjacent to one another. In contrast to more intricate wood joints, there is no shaping or carving involved to create an interlocking structure, and the assembly is typically secured using mechanical fasteners.
Commonly encountered in construction projects, butt joints are frequently employed around elements like baseboards and window trims. They serve as a straightforward choice when the rapid completion of a project takes precedence over aesthetic considerations.
Tip: While the basic nature of the butt joint prioritizes functionality over appearance, enhancing its visual appeal can be achieved by countersinking nails or screws.
2. Miter joint
The term "miter" refers to both an angled cut and the saw responsible for making that cut. In the context of a "miter joint," it involves two 45-degree angled cuts where pieces of wood come together to form a 90-degree angle. Although 45-degree angles are most common, miter butt joints can be cut at various angles, such as 22.5 degrees for constructing octagonal-shaped structures.
Miter joints are frequently utilized at the visible, exterior corners of door, window, and picture frames. They offer greater strength compared to butt joints due to an increased surface area where the two wood pieces meet. However, to ensure stability, miter joints still require both glue and mechanical fasteners.
Tip: Anticipate making minor adjustments to the miter angle, as cuts for door and window frames may not be precisely 45 degrees due to slight variations in drywall or other construction materials.
4. Tongue-and-groove joint
Tongue-and-groove joints involve a tongue, or ridge, on one piece of wood and a corresponding groove, or channel, on the other. The tongue smoothly slides into the groove, forming a robust joint.
Primarily applied to elements lying flat on a surface, such as hardwood floors, these joints are convenient for contractors as flooring materials typically come pre-cut with these joints. The primary challenge lies in seamlessly assembling the elements.
Tip: When creating your own tongue-and-groove joint, ensure that the tongue constitutes one-third of the wood's thickness. For instance, if a board is ¾” thick, the tongue should measure ¼”.
5. Mortise joint
Mortise joints, commonly referred to as mortise-and-tenon joints, may resemble butt joints externally, but they entail carving a protruding element (the tenon) on one piece, which seamlessly fits into a corresponding recess (the mortise) in the other. This configuration results in a significantly stronger and more refined alternative to a butt joint, thanks to the increased gluing surface area where the two wood pieces unite.
Tip: Prioritize cutting the mortise first. Adjusting the tenon to fit the mortise is generally easier than attempting the reverse approach.
6. Half-Lap joint
In a half-lap joint, the ends of two adjoining pieces of wood are reduced to half their thickness at the overlapping point. While there are stronger joint options available, the half-lap joint offers an aesthetic appeal over butt joints by maintaining a consistent thickness with the rest of the structure.
Commonly employed in framing and furniture construction, the significant advantage of half-lap joints lies in preserving the uniform thickness of the frame. This stands in contrast to other joints that may result in a greater and inconsistent thickness compared to the overall structure. It's worth noting that thin pieces of wood can experience substantial weakening when halving their thickness, making half-lap joints particularly suitable for thicker wood pieces.
7. Dado joint
The dado joint derives its name from the Italian word for a die or plinth. This joint features a groove or trench cut into one piece of wood parallel to the grain, into which another piece of wood snugly fits. However, unlike a typical groove, a dado runs perpendicular to the grain.
Primarily applied in shelving systems such as cabinets and bookshelves, dado joints enhance structural stability. It is essential to note that the dado cut should not exceed one-third into the wood. For instance, when working with a piece that is ¾” thick, it is advisable to limit the cut depth to ¼”.
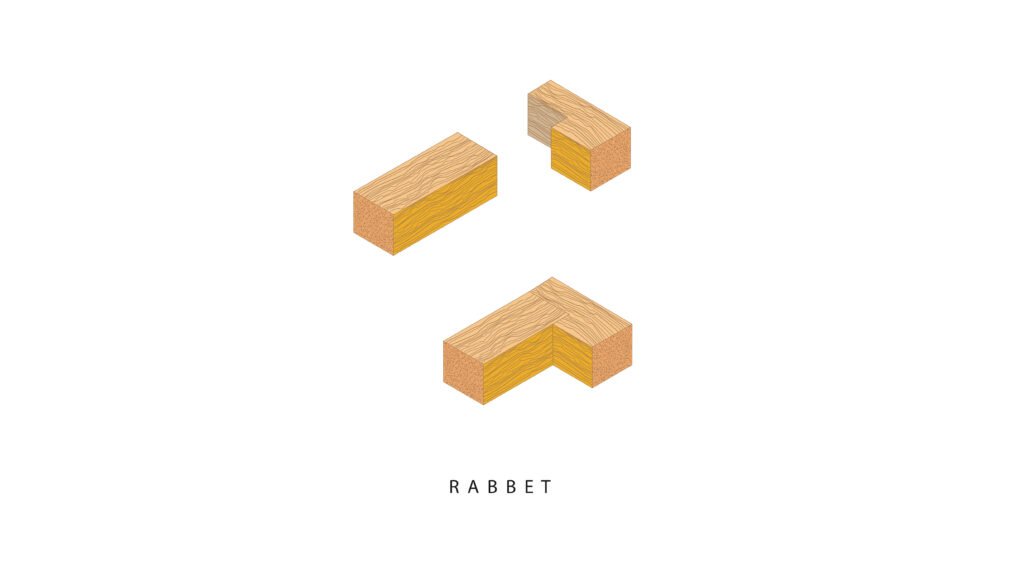
8. Rabbet joint
The rabbet joint, deriving its name from a Middle French word meaning "to force down," is an intriguingly named joint related to the dado joint. It features an open-sided channel along the end of a piece of wood, often complemented by a corresponding cut in the paired piece to form a double rabbet joint.
While rabbet joints boast aesthetic appeal, they are not exceptionally strong, making them well-suited for applications where immense strength is not a prerequisite, such as constructing the back of cabinet cases. If greater rigidity is needed, opting for a double rabbet with its larger surface area becomes the preferable choice.


